Categories
Analog Power

A review of four Switch-mode Buck (Step-down) converters with USB ports

While designing a project that required 5v USB power ports from a much higher voltage source (eg. 12v or 24v), it occurred to me that there are circuits already designed to do this. In fact, not only do they exist as low-cost, easy-to-purchase modules, but some of them already have the USB port soldered onto the board.

4-step-down-buck-usb-converters

Four Step-down converters with USB ports were picked out and reviewed in an attempt to find “the best cheap USB switch-mode step-down converter” for 12v power supplies.

Categories
Analog Microcontrollers

Bathroom Laser Light project — the analog version

A few weeks back, Redditor /u/doakey posted an insanely cool idea to /r/arduino of lighting up his toilet bowl with a red laser so that when he got up in the middle of the night to pee, he could see where he was “shooting”, so to speak. And it was a grand success!

Walk into the bathroom. Laser shoots into the bowl. *pew, pew, pew* Lights up the target like a spotter for some stealth aircraft to hit with a smart bomb. Night vision preserved. Mission accomplished. Laser turns off. Then you go back to bed.

analog-laser-bathroom-light

Yet, he noted that the 9v battery only lasted a few days. Naturally, a few of us pointed out that an Arduino is overkill and that he could have done this using analog electronics.

And I get it. Analog is pretty hard. Arduino is relatively easy. There are plenty of resources out there on how to program Arduinos, but analog… well, it is kind of on its way to becoming a “lost art”.

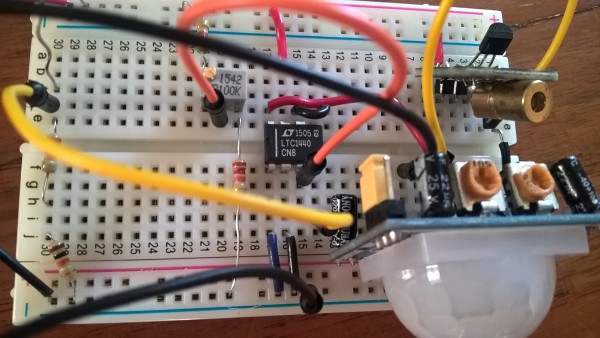
A few people in /r/arduino asked me to write-up my proposed analog verson. After a few weeks of fiddling, here’s the analog circuit (and explanation) I came up with to reproduce the same effects…

Categories
Main

Exploring the Netduino #3: Building the Circuit on a Breadboard

In “Exploring the Netduino #2: (Indirectly) Driving an LED“, we covered the electronic theory of how to use a Power MOSFET to turn the LED On and Off via a digital signal. In this post, we are going to walk the reader step-by-step on how to wire-up the circuit on a breadboard. If you’re using an Arduino, the steps are exactly the same.

As mentioned previously, you will need the following equipment and parts:

  • An electronic breadboard
  • A few common LEDs (like 5mm Red)
  • A couple resistors (a 1 MOhm and a 68 or 100 ohm)
  • N-Channel MOSFET (like RFP30N06LE)
  • A 3.3v power supply or a 2-cell AA Alkaline battery pack (3v)
  • Some jumper wires to connect the circuit together
  • Multi-meter (optional)
  • And a Netduino or Arduino, of course!