Categories
Main

Mini LED USB stick review

“Whoa. What are these?”, I said to myself. And as I looked them over, I realized that what I was holding was essentially just an LED soldered onto a little USB stick. “How useful!”

Mini-LED-USB-sticks-sides
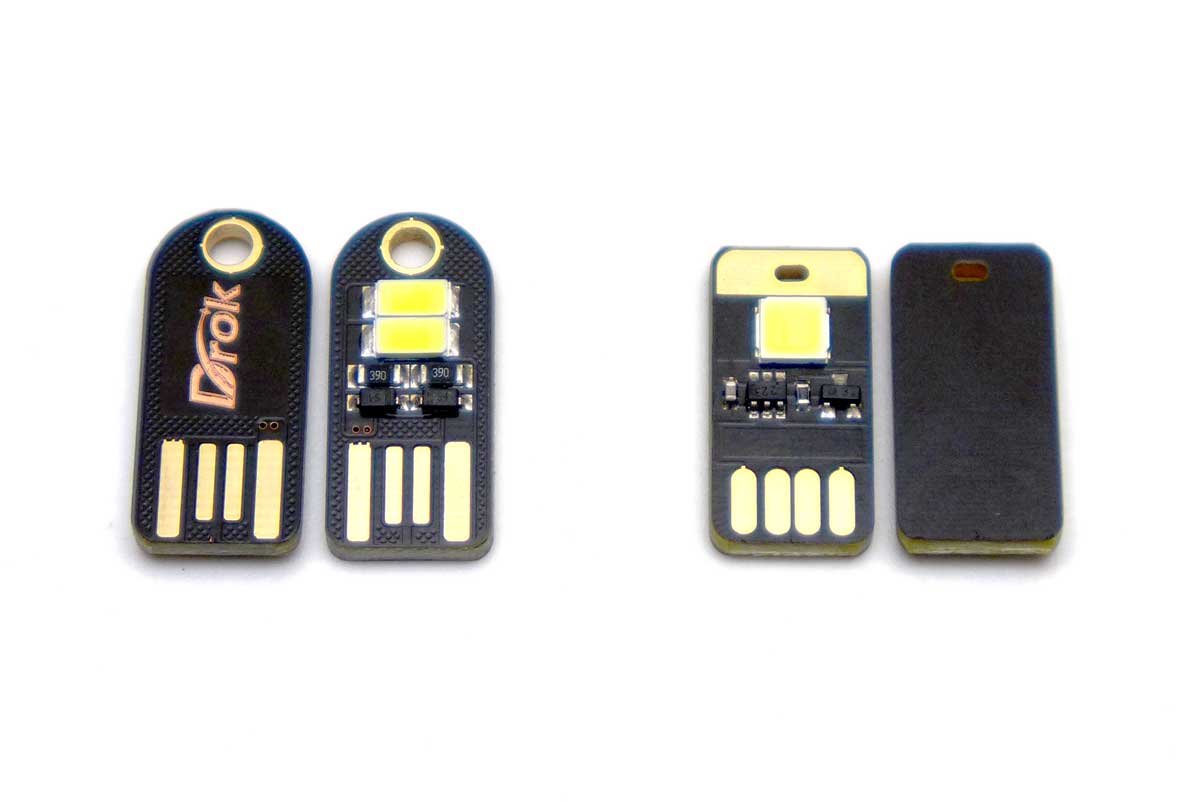
Such a simple concept with such a multitude of purposes.

  • Plug it into the side of your laptop for some additional light.
  • Attach one to a portable USB battery pack for an emergency flash light.
  • Plug one or two into the side of a USB power outlet for an ad-hoc nightlight.
  • Put one on the end of a USB extension cable and snake it into a hard to light spot.

And the nice part is that you can get a 4 or 5 pack of them for less than $10.

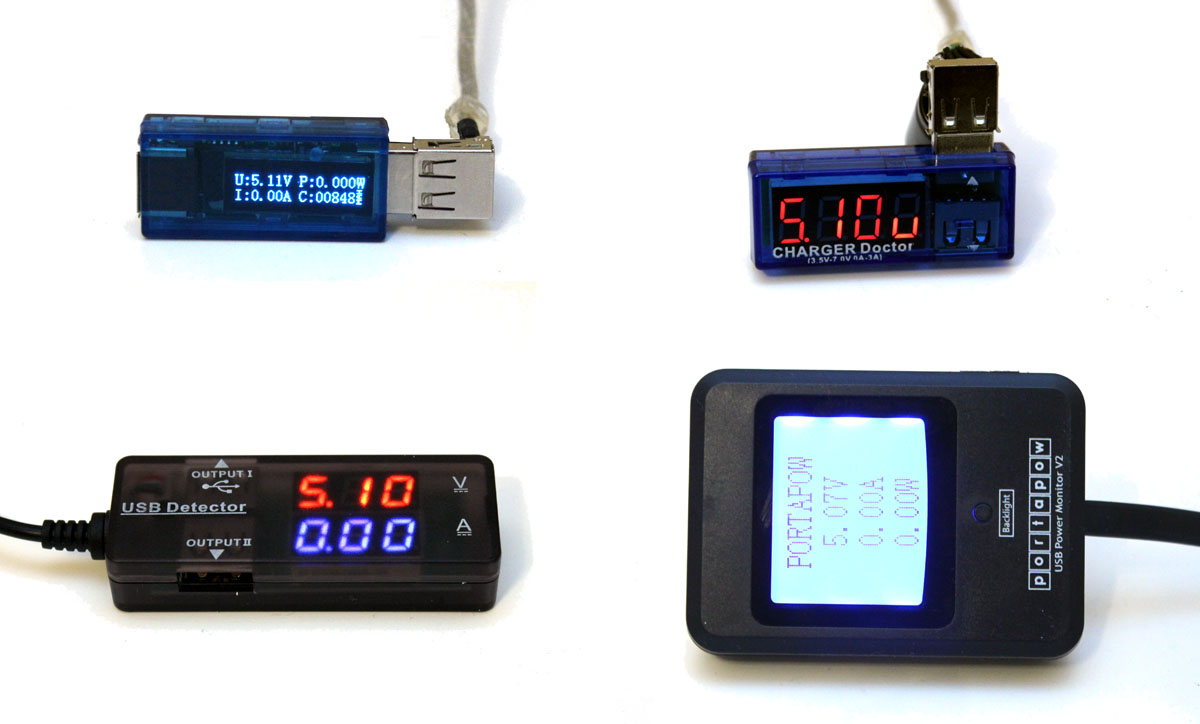
Let’s see how they perform!

Categories
Power

The portable LED USB multimeter (that you didn’t know you needed)

Update 08/01/2016: If you’re looking for full-size multimeters with USB support. There’s a new article on budget DMMs. Of which 2 DMMs have USB data connection support.

The USB port is one of those things in the 21st century that provides the necessary “lifeblood” (electricity) to charge and re-charge all of our fancy cellphones and gadgets. Yet rarely in this process is there a good way to know that things are going well in the power transfer process. Maybe you’ve experienced plugging in your phone to charge and yet for some reason it doesn’t appear to take a charge or perhaps it’s just charging too slowly. And how does one figure out what to do about this? Surely, there is a little gizmo that can help us out here!

four-usb-volt-meters

And sure enough, there is. In fact, there’s more than just one. There’s a whole bunch of them. They go by the names “charger doctor”, “USB detector”, “USB meter”, and even “USB power monitor”. At the end of the day, they’re mostly just digital multimeters designed for the USB port, but what they do is insightful!

And the best part is that they sell for under $15.

Categories
Main

The best Raspberry Pi 3 starter kits compared and reviewed

Update Mar-2016: Most of the kits in the review now contain Raspberry Pi 3 models. The kits themselves haven’t changed significantly (minor SD card and power supply swaps), but the RPi2 has been swapped out for RPi 3. šŸ™‚

Update 20-Feb-2015: All kits have been updated to include Raspberry Pi 2 models! (except for the Make kit.)

The Raspberry Pi is an amazing low-cost computer. Unlike the ever-popular Arduino microcontroller, the Raspberry Pi was designed to be a full-blown computer from the start. It can run various flavors of Linux/Unix, act as a Media Center, and even moonlight as a Microcontroller.

raspberry-pi-b+-boardAnd what better way to get started with a Raspberry Pi than with a starter kit? The question is: which one to get?

Categories
Main

The best Arduino starter kits compared and reviewed

The Arduino is arguably one of the best things to come to the “Maker” Renaissance that we are currently experiencing. The Arduino is a simple microcontroller that can allow the one who wields it great power and programmatic control over their electronic circuits and systems. Yet to be a great wizard of such things, one must start at the humble beginnings of the very basics.arduino-angledWhat better way to get started than with an Arduino starter kit? That’s the trick, though, isn’t it? There’s more than one starter kit out there!

Categories
Main

Exploring the Netduino #4: Make LEDs *really* Glow (or: Fun with PWM)

In our last entry, “Exploring the Netduino #3: Building the circuit on a Breadboard“, we covered the step-by-step method to wire up the proposed schematic for switching an LED on and off via a power MOSFET. In this entry, we are going to get to the fun stuff: CODE!

But first, a little bit on LEDs

Light Emitting Diodes (LEDs) may function a lot like (incandescent) lightbulbs, but they should never be treated like them. Like lightbulbs, LEDs can be dimmed by controlling the forward voltage. Unlike light bulbs, this range tends to be rather narrow and as such is somewhat difficult to control. Fortunately, dimming LEDs can happen another way that is particularly easy to do with a digital circuit: Pulse Width Modulation (PWM).

Categories
Main

Exploring the Netduino #3: Building the Circuit on a Breadboard

In “Exploring the Netduino #2: (Indirectly) Driving an LED“, we covered the electronic theory of how to use a Power MOSFET to turn the LED On and Off via a digital signal. In this post, we are going to walk the reader step-by-step on how to wire-up the circuit on a breadboard. If you’re using an Arduino, the steps are exactly the same.

As mentioned previously, you will need the following equipment and parts:

  • An electronic breadboard
  • A few common LEDs (like 5mm Red)
  • A couple resistors (a 1 MOhm and a 68 or 100 ohm)
  • N-Channel MOSFET (like RFP30N06LE)
  • A 3.3v power supply or a 2-cell AA Alkaline battery pack (3v)
  • Some jumper wires to connect the circuit together
  • Multi-meter (optional)
  • And a Netduino or Arduino, of course!
Categories
Main

Exploring the Netduino #2: (Indirectly) Driving an LED

In “Exploring the Netduino #1“, you may recall that it was suggested that the reader take a look at the Netduino ā€œGetting Startingā€ guide found on the Netduino.com site to get a feel for the hardware. The guide walks the user through a “Hello, World” equivalent where theĀ  user ends up getting the blue on-board LED to blink on and off. This tutorial aims to pickup where that guide left off.

Over the next few posts, we will cover how to wire up an LED to control its brightness using the Netduino’s Pulse-Width Modulation (PWM) features and supporting electronic circuitry.